
Live Salmonella Vaccine Storage, Handling and Administration
Published on : 5 Sep 2022
The benefit of using a live vaccine administered via the water route is that it provides a method of application that both minimises the stress to the birds and mimics the route of natural infection by providing protection immediately on a cellular level to the intestinal tract of the bird.
The key element of properly understanding the importance of the use of live vaccines is that by using a live vaccine that has been attenuated to provide an immune response will only be effective if the vaccine has remained in a live state. If a live vaccine is exposed to poor storage, contact with cleaning chemicals or antibiotics, chlorine and/or is not properly administered then the titre (amount of antigen present) will be reduced which in turn will negatively affect the ability of the vaccine to produce a good immune response.
We have found live vaccine to offer excellent protection against field strains of serotypes Enteritidis and Typhimurium from the first administration to the end of the lay providing the process of storage, handling and administration have been followed.
Salmonella Vaccine Administration via the Water Route – A Complete Guide
The first area to pay attention to is that we recommend that water treatments are turned off preferably 48 or a minimum of 24 hours before the water vaccination is due. This is due to the primary function of a water treatment system that uses either acids or chlorine is eliminate virus and bacteria in the water. As Vaccine is attenuated virus or bacteria, exposure to these chemicals will render it ineffective.
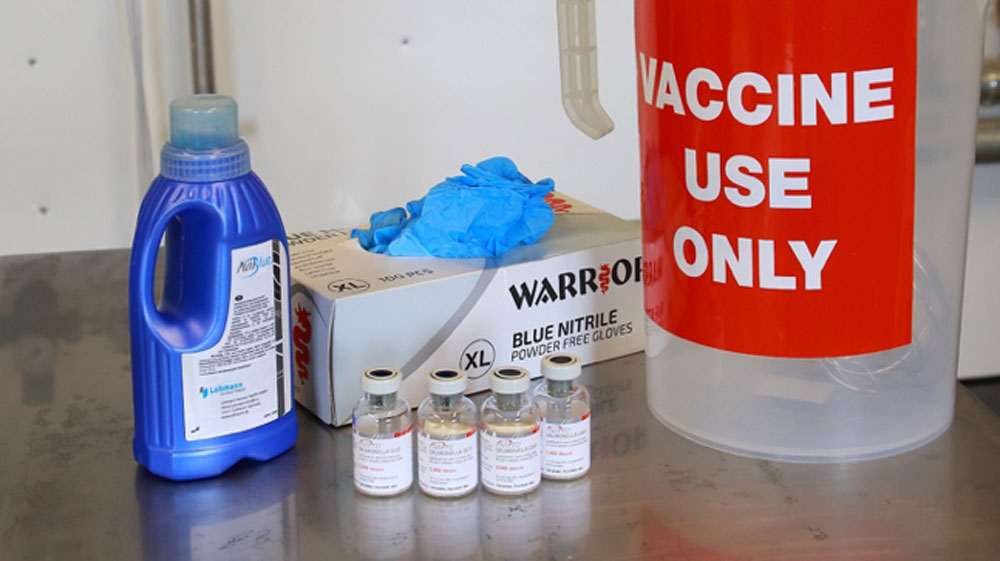
Water Stabiliser should ALWAYS be used as mains and borehole sourced water with either Chlorine or heavy minerals present will damage the vaccine. We recommend Aviblue which has been shown to effectively buffer the vaccine and provide a greater duration of time in which the vaccine will remain effective.
Storage of live vaccine
The correct temperature to store the Salmonella vaccines is always between 2-8ºC.
For the refrigeration unit used to store the vaccines at the rearing site it is important to bear in mind the value of the goods and their importance in producing fully protected pullets. Therefore, we advise that a new unit is purchased a where possible it should be of a light commercial standard fitted with metal grills and an air circulation fan which ensure an even temperature throughout the entire fridge. These units are also more resistant to external temperature fluctuations that occur in outbuildings.
In order to ensure that this temperature range is maintained we advise our customers to invest in a min/max thermometer that has been validated against a calibrated device.
The device should be stored close to the vaccines in the centre of the fridge and should be reset daily after the Minimum and Maximum temperatures have been recorded.
Handling of live vaccine
Surface
Vaccine should be prepared on a clean surface that has been wiped with warm water and is free from chemicals and debris. Vaccine should never be prepared on the floor or near to any kind of foot dip. It may be necessary to place a clean plastic bag or paper on the preparation surface.
Mixing Equipment
The equipment used for both the mixing and administration of vaccine should only ever be used for vaccine and clearly labelled as such. Store the equipment off the floor and only ever wash with warm water.
Mixing Method
Remove vaccine from the fridge and check to confirm;
1. The vaccine is the correct type
2. That is within its expiry date
3. That you have the correct number of doses (Never cut doses)
Wearing gloves proceed to measure 4 litres into the measuring jug with 1g of Aviblue. Remove the protective caps from the vials and then submerge the vials underwater and open. This will prevent a cap forming of the freeze-dried vaccine and making mixing easier. Once all vials have been opened underwater then thoroughly mix the solution using a whisk.
Follow Up Actions
In order to refine the vaccination process, we recommend that a note is made of the vaccination start and finish times to allow you to modify the volumes of water used for future vaccinations. Also, the line priming will allow any debris to be removed from the lines and alert the farm manager to the presence of biofilm or mineral build up within the water lines which can be detrimental to bird health.
Once the vaccination is complete, we recommend that you put 4 litres of clean water into the stock solution and allow it to flush the Dosatron pipe and system. All equipment should be washed with warm water and stored away from dust and chemicals.
1. Check Dosatron to ensure it is set correctly if the unit is adjustable. If needed flush with clean water prior to starting the vaccination.
2. Place stock solution pipe/filter into the vaccine and turn the water feed to the Dosatron and ensure that the bypass has been turned off.
3. If the water lines have been lifted above bird height, then the lights can be left on during the line priming process.
4. If the water lines are at bird height of the rearing unit does not allow the lines to be lifted, then we advise that torches and radios are used.
5. Agree upon a line with which to start and how you will proceed in order of water lines to prevent the flush valve damaging the nipple line connections.
6. An operative should go to the far end of the water line and open the tap to drain into a bucket, once open they should notify the operative at near end to engage the flush valve.
7. Once the blue dye is present at the end of the line the flush valve operator should be notified to turn off the flush.
8. When the pressure has been reduced this line can be sealed and the next line can begin.
9. When complete turn on the lights and lower lines to bird height if needed.
Note: in a modern unit of 40,000 birds this whole process can be completed in as little as 20 minutes.